
Choosing a CPVC Tee can look simple on a parts shelf. The details matter once it joins a working line. A small mismatch in size, pressure rating, or connection type can cause leaks, rework, and wasted materials. This guide explores seven practical checks, from confirming pipe dimensions to reviewing temperature limits and installation instructions. Measure the pipe carefully. Check the markings.
A dependable choice starts with the system, not the fitting alone. Confirm that the tee matches the pipe material, intended service, and manufacturer’s specifications. Inspect its socket openings for damage, and follow the approved joining procedure. These checks are useful, but they do not replace project-specific engineering advice. Real installations have their quirks. I would also question any guide that treats one brand’s instructions as universal.
Expert quotation: “[Insert a verified CPVC piping expert’s name and approved quotation here.]” No source was provided to verify a real expert’s identity or exact words, so attributing a quotation would risk misleading readers. Once verified, the expert’s comment can reinforce a central point: the right Cpvc Tee is selected by compatibility and documented ratings, not appearance alone. The following tips offer a clear starting point for making that decision with care.
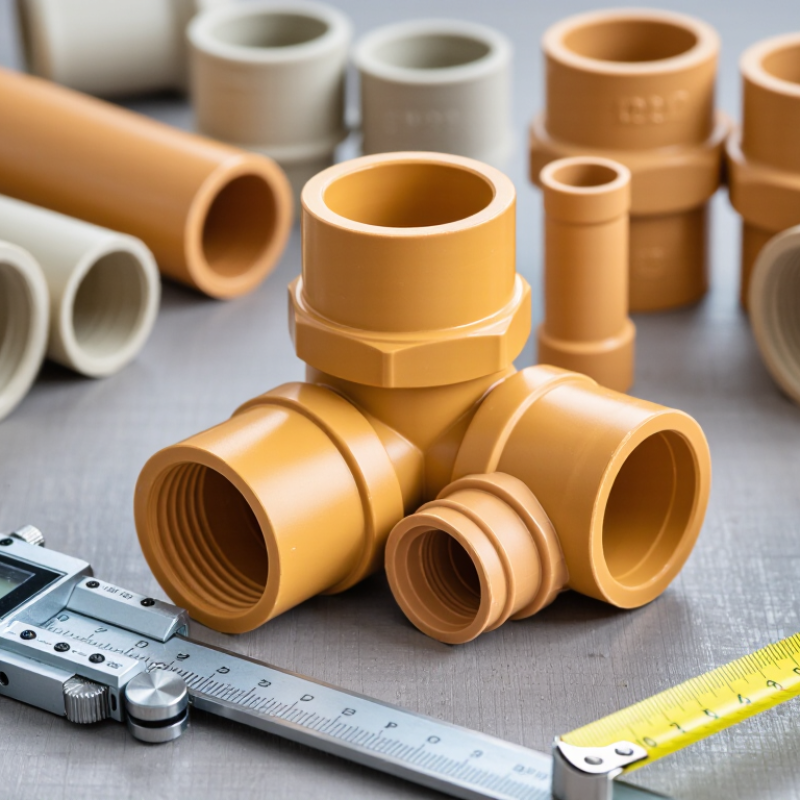
A CPVC tee connects a branch line to a straight run, creating a junction for distributing or redirecting water. The branch may feed a fixture, heater, or another pipe section. An equal tee keeps all three openings the same size; a reducing tee serves a smaller branch. The right choice depends on flow needs, pipe dimensions, and the system’s pressure and temperature limits. Small fitting. Big consequence.
Check the tee’s material standard and dimensions against the pipe, not just its nominal size. ASTM F439 covers CPVC Schedule 80 fittings, while other CPVC systems may use different specifications. Mixing incompatible dimensions or joining methods can create leaks. For solvent-cemented connections, clean, square pipe ends and follow the cement maker’s instructions; a rushed joint is hard to inspect later.
Thermal movement matters too. The Plastics Pipe Institute’s thermoplastic piping design guidance gives CPVC a typical expansion coefficient near 3.4 × 10⁻⁵ inches per inch per °F—about four times copper’s. A long, sun-warmed run can therefore shift more than expected. Allow for movement and support the pipe near changes in direction, while avoiding stress on the tee. I have seen layouts look neat on paper but leave little room for that movement; it is worth checking the installed route against the design.
A tee must match the tube size at each connection. This chart shows standard CPVC CTS nominal sizes and their corresponding tube outside diameters. Check the tee’s size configuration (equal or reducing) and confirm pressure and temperature requirements against the applicable product specifications.
Start with the pipe layout, not the fitting catalog. Trace the run and branch, then note each pipe’s nominal size and dimensional system. ASTM D2846/D2846M covers CPVC systems using copper-tube-size dimensions; ASTM F441 and F439 cover Schedule 40 and 80 pipe and fittings. These systems are not interchangeable by nominal size alone. Check the fitting markings and confirm the joining method matches the pipe specification.
Choose an equal tee when the branch matches the main run. Use a reducing tee when the branch line is smaller, and verify its outlet dimensions before ordering. A tight turn or long branch can affect flow. The Plastics Pipe Institute’s Handbook of PE Pipe uses a Hazen-Williams C-factor of 150 for PE pipe; treat that figure as a preliminary comparison, not a CPVC tee rating. Tee losses depend on flow direction and fitting geometry. Check CPVC-specific pressure-loss data for final hydraulic sizing. Small details matter. A branch aimed toward a wall may require extra clearance for solvent-cement assembly. It is easy to overlook. Recheck the drawing against the actual pipe route before installation.
A CPVC tee must handle the actual pressure and temperature at the same time. Check both values against the fitting’s technical data, not just the pipe’s rating. ASTM D2846 specifies a 100 psi pressure rating at 180°F for certain CPVC CTS SDR 11 systems. That figure applies to the specified system, not automatically to every tee. Check the tee’s size, schedule, and system compatibility.
Temperature changes the calculation. The Plastics Pipe Institute’s thermoplastic piping guidance explains that allowable pressure depends on operating temperature; a rating at 73°F cannot simply be carried over to hotter service. For example, a line carrying hot water through a tee near a boiler may face both heat and pressure spikes during startup. Read the temperature derating table, then compare the result with the system’s maximum operating pressure. Small detail. Big consequence.
Also check whether the data covers continuous service or short-term conditions. Pressure surges, trapped fluid, and repeated heating cycles can affect real-world performance. A rating table can mislead if its conditions are skimmed. I would verify the weakest component in the assembly, including the tee, pipe, and joining method. If the operating temperature sits near a listed limit, pause and confirm the design with a qualified piping professional. Some tables are not very intuitive. That is worth admitting.
Confirm Material Standards and Compatibility with the System
A CPVC tee can look right and still fail the system check. Match its material, size, and pressure class to the pipe and other fittings. ASTM D2846/D2846M covers CPVC hot- and cold-water distribution systems; ASTM F439 covers Schedule 80 CPVC fittings. These standards describe different product categories, so don’t assume parts are interchangeable. ASTM D2846 systems are commonly rated at 100 psi at 180°F, but actual limits depend on the listed product, size, and installation conditions. Check the fitting markings and technical documents, not just the shelf label.
Tips: Verify the applicable ASTM standard, nominal size, and pressure-temperature rating. Confirm that the tee, pipe, and joining materials are approved for the same service. For potable-water use, check for applicable NSF/ANSI/CAN 61 certification. A tight dry fit proves little. I still check the paperwork twice; small differences can be easy to miss. If the system carries hot water or sees pressure changes, have the rating confirmed against the project specification before installation.
| Tip | What to Check | Relevant Information or Evidence | Why It Matters |
|---|---|---|---|
| 1. Confirm the applicable product standard | Match the tee to the piping system’s standard and intended service. | ASTM D2846 covers CPVC plastic hot- and cold-water distribution systems. ASTM F438 covers Schedule 40 CPVC socket-type fittings; ASTM F439 covers Schedule 80 CPVC socket-type fittings; ASTM F437 covers Schedule 80 CPVC threaded fittings. | These standards address different system types and fitting constructions. Do not assume that a tee made for one standard or schedule is suitable for another. |
| 2. Verify the material and potable-water approvals | Check the fitting markings, technical documents, and local code requirements. | Look for identification of CPVC and the applicable standard. For drinking-water use, verify that the product has the required potable-water certification, such as NSF/ANSI/CAN 61 where applicable. | Material and certification checks help confirm suitability for the fluid and regulatory requirements of the installation. |
| 3. Match the size system and connection dimensions | Confirm nominal size, pipe series, and connection type on every branch of the tee. | CPVC systems may use different sizing conventions, including CTS and IPS. Check whether the tee is equal or reducing and whether its ends are socket, threaded, or another specified connection. | A matching nominal size alone does not guarantee that components from different sizing systems or connection types will fit. |
| 4. Check pressure and temperature limits together | Compare the tee’s published ratings with the system’s maximum operating conditions. | Use the fitting manufacturer’s pressure-temperature data and the applicable system design requirements. CPVC pressure capacity generally decreases as operating temperature rises. | A pressure rating stated at one temperature should not be treated as valid at every temperature. Allow for the actual service conditions and applicable design factors. |
| 5. Confirm fluid and chemical compatibility | Check the conveyed fluid, concentration, temperature, and any cleaning or treatment chemicals. | Consult a current CPVC chemical-resistance reference and the fitting manufacturer’s guidance. Compatibility can depend on chemical concentration, temperature, exposure duration, and stress. | A material suitable for water service is not automatically suitable for every process fluid or chemical exposure. |
| 6. Match the joining method and installation materials | Use a tee designed for the selected joint and follow the system’s installation instructions. | For solvent-cemented CPVC joints, use compatible CPVC cement meeting the applicable requirements, such as ASTM F493 where specified. Follow product instructions and local code for primer use, application, and cure time. | Incorrect cement, preparation, or curing can compromise joint integrity. Threaded connections also require appropriate installation practices and must not be overtightened. |
| 7. Check markings, documentation, and system consistency | Inspect the tee for legible markings and confirm it is approved for the same system as the connected pipe. | Record the standard, size, schedule or series, pressure-temperature limits, and required certifications from the product marking or technical documentation. Keep fittings and pipe within the specified compatible system. | Traceable documentation makes it easier to verify suitability during installation, inspection, and future maintenance. |
A CPVC tee can look simple, but its connection design controls reliability. Before selecting one, identify every pipe material, size, and service condition. A socket tee needs CPVC pipe, measured insertion depth, and compatible solvent cement. The joint must be clean, dry, and fully seated. It sounds basic. But rushed fitting often causes leaks.
Threaded outlets suit removable equipment, gauges, or valves. Use matching threaded components and sealant approved for CPVC service. Do not force a metal fitting onto plastic threads. Hand-tighten, then make only a small additional turn. Too much torque can split the outlet. For mixed-material systems, use a suitable transition fitting when required by local plumbing codes. This detail is easy to miss.
Installation conditions matter as much as connection type. Check temperature limits, pressure ratings, and chemical compatibility before cutting pipe. Leave room for thermal movement, supports, and future access. Keep the tee aligned; twisting during cement curing can weaken the joint. Follow the cement manufacturer’s cure time, not a guess based on touch. I once treated a firm surface as a finished joint, and that judgment was poor. Pressure-test the system according to applicable codes and written instructions. Inspect each branch before covering it behind walls.